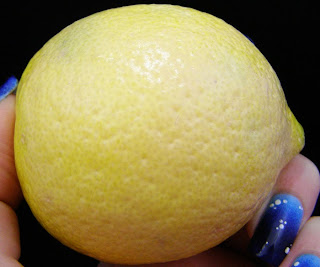
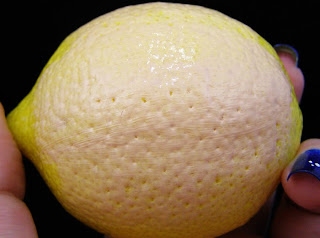
While cruising Pinterest (shut up), I stumbled upon a really cool blog post. It detailed the difference that the application tool makes when it comes to foundation. It's one of those things you know, but it's kinda awesome to see it demonstrated so plainly. I decided to give this a test, using all of the foundation tools I have accumulated.
First, you need a bowl of lemons. Or oranges, whatever. They have loads of dimples on the peel that is very similar to skin, albeit exaggerated.
Then, you must collect your tools.
What I used:
A cheapy, disposable cosmetic wedge from Target
A knock-off Beauty Blender
Eco Tools flat foundation brush
Real Techniques buffing brush
Real Techniques stippling brush
my fingers
Eco Tools Flat Foundation brush
This one looks the most like a proper paint brush, and that is basically what it does. It just lays the foundation on the skin. If you have really great skin, this will work fine for you. Alas, it does not work for me. My face ends up looking terribly similar to this lemon, all pits and pores.
Real Techniques Buffing Brush
This might be the best brush for applying foundation. If you have normal skin, it will fill in all the little pores flawlessly. You'll get a nice, even finish with it. But if you have problem skin (like me and my flaky spots) it will just stir them up and highlight them. I reserve this brush for blending out contour and blushers.
Real Techniques Stippling Brush
This is my second favorite tool to use. I prefer a more sheer finish, and this gives it to me. (I was also running out of my sample here.) It gets into all the crevices without irritating my flaky skin, and gives me an almost airbrushed finish. It's also very easy to layer, so you can apply more to areas that need extra help. But, because I do have some texture issues with my skin, it can get a little heavy for me.
 |
| this is not indicative of the coverage you can get. I was just running out of the samples I had. Ooops! |
Cheapo Cosmetic Wedge
Possibly the most budget friendly tool, aside from your fingers. If you dampen the sponge, you get a lovely sheer layer of foundation on your skin. The dampness helps it to just blend right in, leaving you without the obvious makeup look. It's also easily built up, so you can have more coverage in the places you need it most. The only downside to these is that they aren't intended to be reused. You can wash them, but they don't last more than a few applications.
Knock-off Beauty Blender
After reading pages and pages of reviews for the actual Beauty Blender, I decided to find a dupe. I figured if I liked the dupe, then I'd love the real thing. Well, let me tell you, I love the dupe. I picked this up for $5 at Marshall's, and it's worth every penny. This gives me the most natural look I've ever had with foundation. It even passes my magnifying mirror test. When you dampen this sponge (and the instructions say you must), it really just makes the foundation look like your real skin. And in places you've applied too much, the sponge can pick some product up, and fix the trouble without having to remove your whole face. These have a lifespan of about 3-6 months, and while they are a bit tricky to get completely clean, they are definitely reusable.
My Poor Fingers
I cannot ever use this method on my face. It's all streaks and pores for me. If I were faced with fingers or no foundation, I'll choose "no foundation every time. I have serious trouble getting an even layer with my fingers, and somehow, I always end up with polka dot pores. But, for some folks this works.


This is so helpful! Thank you.
ReplyDeleteNo problem! I found the original really interesting, so I had to try it. I think it would have been more obvious if my foundation weren't so pale!
Delete